I used to program in Visual Basic 6.0. It is a great tool but not perfect. It was lacking some crucial controls. A Splitter control was one of them. Microsoft has added it to the .NET framework (thanks) but forgot to make it easy to use. You must place it on a Form, set some properties for it and then also some (Dock) properties of the other two controls. Then you have to set the order of the controls correctly by using 'Bring to Front' or 'Send to Back'.
This article demonstrates the use of a simple AddSplitter() method which simplifies the use of splitters.
AddSplitter() method
/// Add a splitter between the two given controls
/// </summary>
/// <param name="control1">Control 1</param>
/// <param name="control2">Control 2</param>
/// <param name="vertical">Vertical orientation</param>
/// <returns>The created Splitter</returns>
public static Splitter AddSplitter(Control control1, Control control2,bool vertical)
{
Control parent =control1.Parent;
// Validate
if (parent!=control2.Parent)
thrownew ArgumentException(
"Both controls must be placed on the same Containter");
if(parent.Controls.Count > 2)
thrownew ArgumentException(
"There may only be 2 controls on the Container");
parent.SuspendLayout();
// Move control2 before control1
if (parent.Controls.IndexOf(control2) > parent.Controls.IndexOf(control1))
parent.Controls.SetChildIndex(control2,0);
// Create splitter
Splitter splitter=new Splitter();
splitter.Dock = System.Windows.Forms.DockStyle.Left;
// Set controls properties
control2.Dock = DockStyle.Fill;
if(vertical)
{
control1.Dock = DockStyle.Left;
splitter.Dock = DockStyle.Left;
splitter.Width = 6;
}
else
{
control1.Dock = DockStyle.Top;
splitter.Dock = DockStyle.Top;
splitter.Height = 6;
splitter.Cursor = Cursors.HSplit;
}
// Add splitter to the parent in the middle
parent.Controls.Add(splitter);
parent.Controls.SetChildIndex(splitter,1);
parent.ResumeLayout();
return splitter;
}
Usage
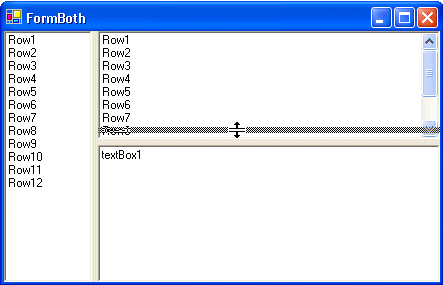
I will explain how you can create a Form with two Spitters as shown above. Create a Windows Form and a a ListBox and a Panel to it. Add another ListBox and TextBox and place them in the Panel.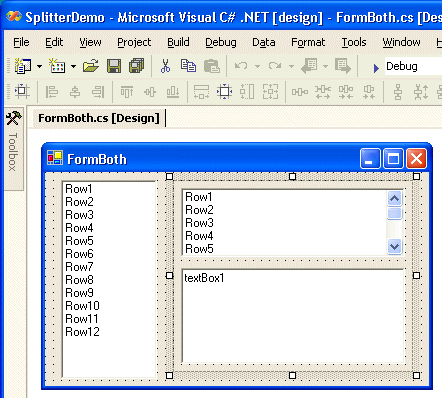
Do not place any Spliters on the Form, they will be added using the AddSplitter() method. Modify the constructor of the Form.
{
//
// Required for Windows Form Designer support
//
InitializeComponent();
//
// Add Splitter
//
ControlUtil.AddSplitter(listBox1,panel1, true);
ControlUtil.AddSplitter(listBox2,textBox1,false);
}
The vertical splitter is added between Listbox1 and the panel. The horizontal splitter is added between ListBox2 and TextBox1.
Conclusion
Splitters are great but not easy to use, the AddSplitter() method solves this.
Any suggestions and feedback for improving this article is most welcome. Send your suggestions and feedback to Fons.Sonnemans@reflectionit.nl
DownloadAll postings/content on this blog are provided "AS IS" with no warranties, and confer no rights. All entries in this blog are my opinion and don't necessarily reflect the opinion of my employer or sponsors. The content on this site is licensed under a Creative Commons Attribution By license.

Blog comments
:)
29-Jun-2014 4:21